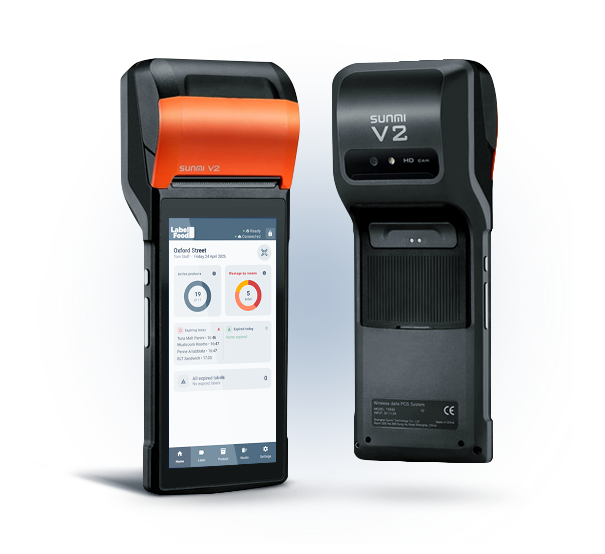
How much time does your team lose to manual ingredient labelling and error-prone waste tracking every single week? In a high-pressure commercial kitchen, maintaining a high EHO hygiene rating and meeting Natasha’s Law requirements shouldn't feel like an administrative burden. You need a reliable system that works as hard as your chefs without the fragility of standard consumer tablets or third-party hardware.
This LabelFood Printer SV2 setup guide provides a clear, technical path to configuring your system for total UK food safety compliance and operational efficiency. We understand that you're busy and need solutions that work immediately. By following this guide, you'll establish a fully functional, standalone labelling station that handles the complexities of PPDS allergen highlighting automatically, ensuring the 14 statutory allergens are always correctly identified.
We'll walk you through the physical installation, cloud dashboard synchronisation, and the AI-assisted menu onboarding process. You'll move from manual guesswork to audit-ready digital logs, ensuring your kitchen stays organised and compliant whilst maintaining the speed your service demands.
Key Takeaways
- Position the standalone SV2 terminal on a stable surface to create a dedicated labelling station. This LabelFood Printer SV2 setup guide ensures your hardware is integrated correctly into your kitchen workflow.
- Access the management panel via web or iOS to synchronise menu data. Use the AI-assisted onboarding tool to import product catalogues for your manual review and editing.
- Automate allergen highlighting for PPDS food to support Natasha’s Law requirements. The system identifies all 14 statutory allergens whilst distinguishing between peanuts and other nuts.
- Replace manual "day dots" with digital prep labels and waste logs. Every entry is attributed to specific team members using individual PINs for precise accountability.
- Prepare for EHO inspections by accessing the Compliance Pack and Label Reports. These digital records provide an audit-ready trail of your food safety management and preparation history.
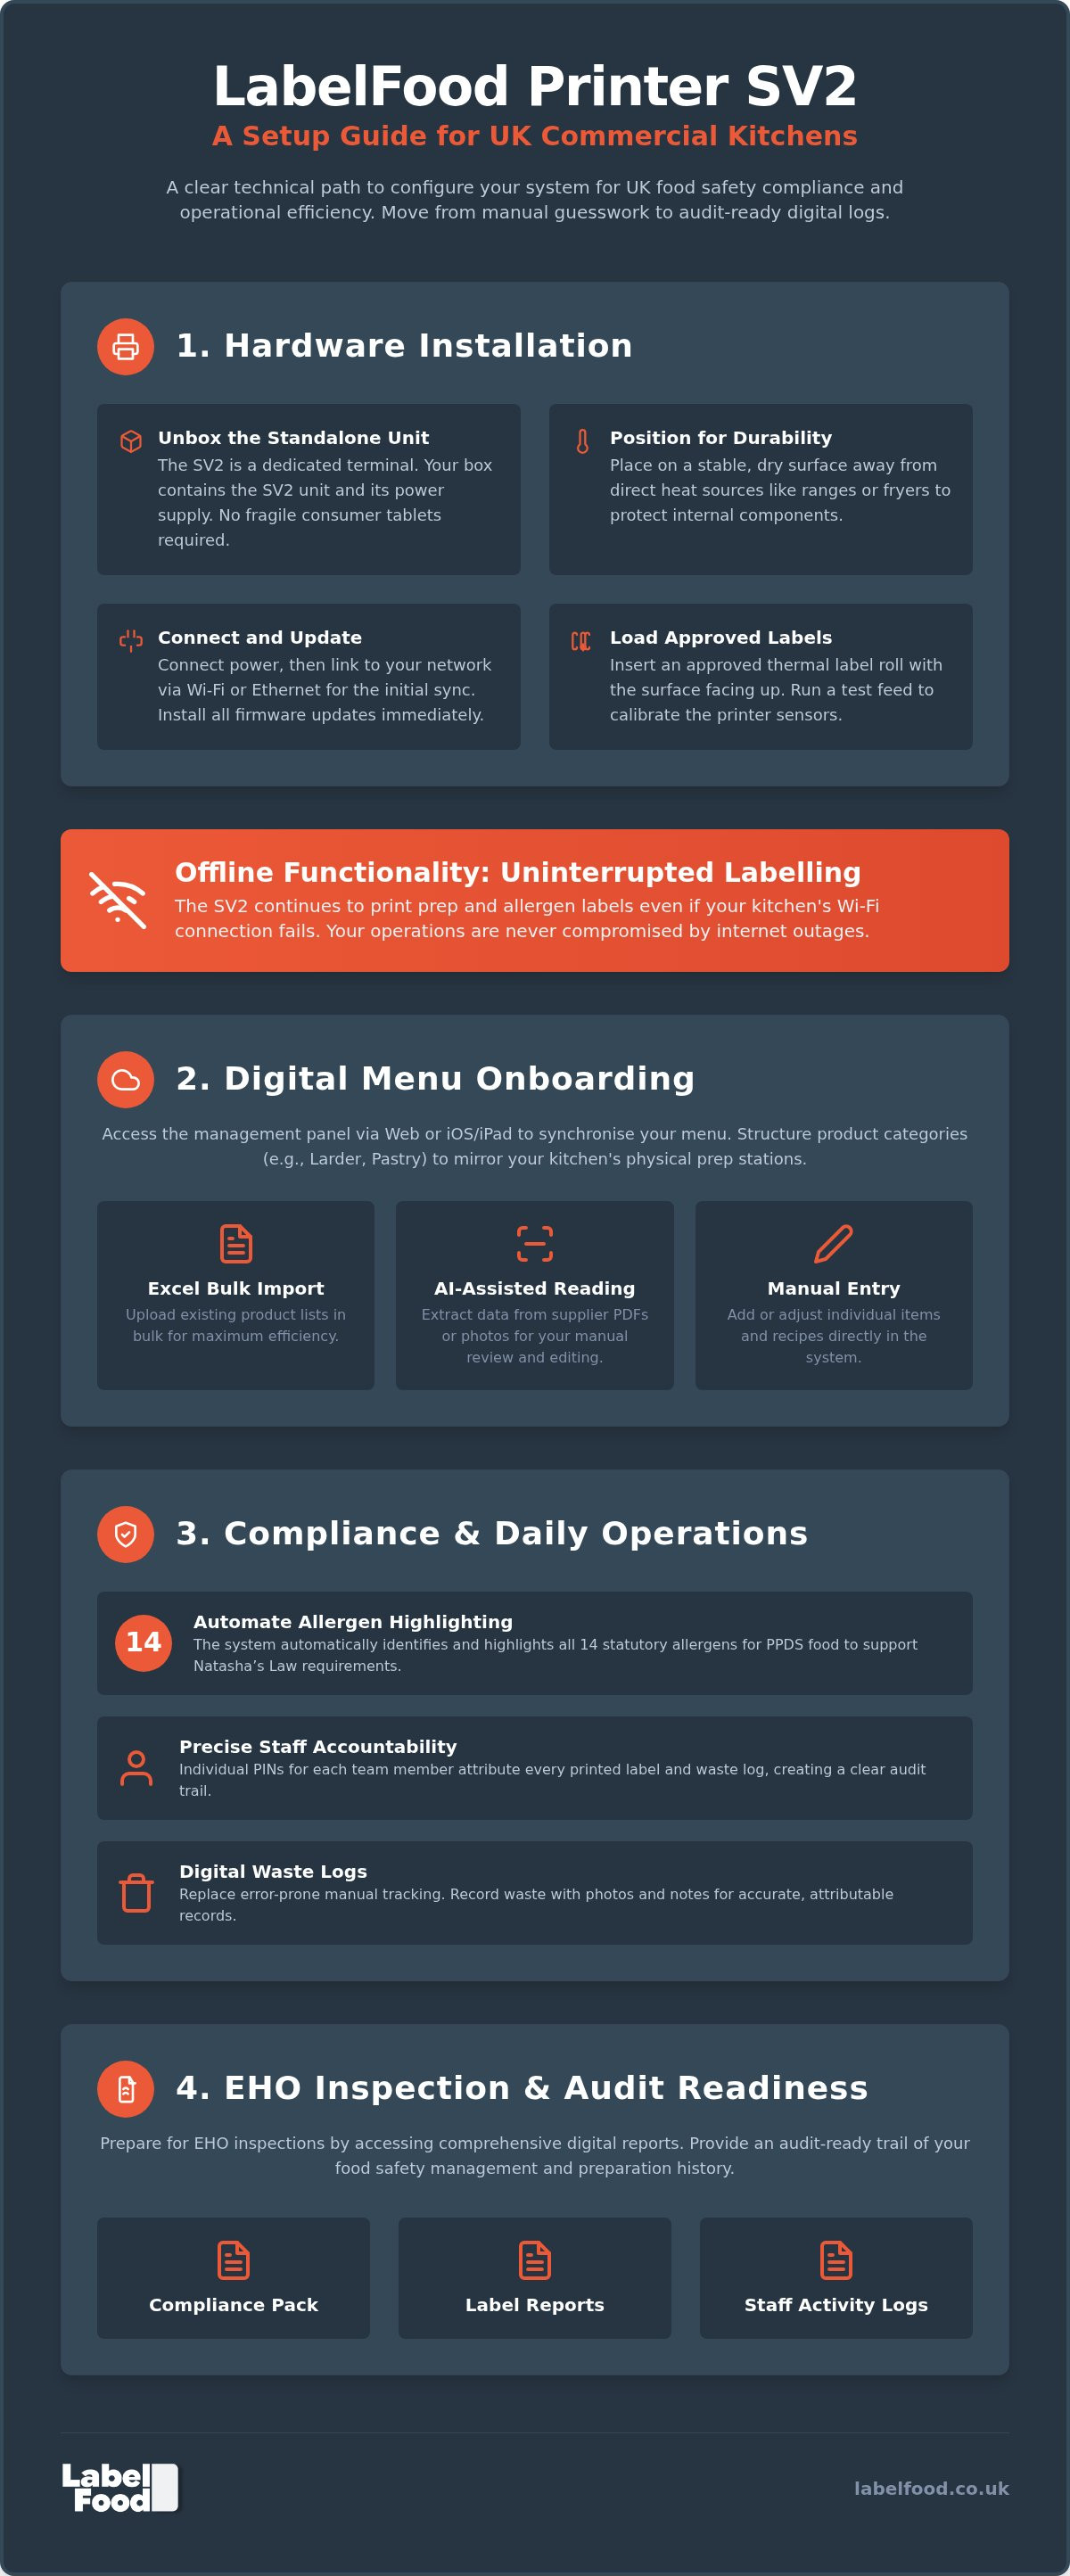
Unboxing and Connecting the LabelFood Printer SV2 Hardware
The LabelFood Printer SV2 arrives as a comprehensive, standalone solution for your kitchen. Unlike generic labelling systems that rely on consumer tablets and unstable Bluetooth connections, the SV2 is a dedicated terminal. It's built for the rigours of a professional environment. Start by confirming all components are present in the box. You should find the SV2 terminal and its dedicated power supply unit. This LabelFood Printer SV2 setup guide focuses on establishing a permanent, reliable station that your team can depend on during the busiest shifts.
Positioning is critical for hardware longevity. Place the unit on a stable, dry surface at a comfortable working height. Ensure it's situated away from direct heat sources like ranges or deep fat fryers. Steam and high temperatures can damage the internal thermal components and compromise label adhesion. Because the SV2 is a standalone device, you don't need to worry about peripheral tablet stands or charging cables cluttering your workspace. It's a singular, robust tool designed for kitchen durability.
A primary advantage of this system is its offline functionality. Whilst an internet connection is required for initial configuration and data syncing, the SV2 continues to function if your Wi-Fi fails. This ensures that your labelling and prep cycles aren't interrupted by external connectivity issues. A deeper understanding food allergies and the legal requirements of Natasha’s Law highlights why constant uptime is vital. You cannot afford to stop labelling PPDS items simply because the internet is down.
Powering On and Network Configuration
Connect the power cable and allow the terminal to initiate its startup sequence. For the initial cloud sync, you'll need to connect the device to your local network. You can select your Wi-Fi network from the settings menu or use an Ethernet cable for a more stable, wired connection. Once the device is online, it'll prompt you to check for firmware updates. Always install these immediately. Updates ensure the system operates with the latest security protocols and performance optimisations, keeping your LabelFood Printer SV2 setup guide current with the latest features.
Loading Label Rolls for Thermal Printing
Open the printer compartment by releasing the top latch. Insert a LabelFood approved thermal label roll, ensuring the labelling surface faces upwards towards the print head. The roll must be seated centrally to prevent jams. Close the compartment firmly and perform a test feed. This action calibrates the internal sensors to the specific label size and ensures the print quality is crisp and legible. Using approved rolls is essential. Generic alternatives often lack the thermal sensitivity required for high-speed kitchen printing and can cause premature wear on the hardware.
This LabelFood Printer SV2 setup guide ensures your digital menu matches your physical reality. Once the hardware is powered on, shift focus to the digital management layer. Access the dashboard through a standard web browser or the dedicated iOS/iPad app. Recognise that the management panel is currently unavailable for Android devices. This centralised hub is what makes LabelFood a complete food labelling solution UK. It allows multi-site operators to control menu data from a single location with absolute precision.
Efficiency starts with organisation. Structure your product categories to mirror your kitchen's physical prep stations. Create distinct sections for "Larder", "Pastry", and "Hot Line". This logical mapping reduces the time staff spend searching for items on the SV2 terminal. By improving restaurant operations through better data structure, you minimise friction during peak service hours. A well-organised dashboard translates directly to a faster, more disciplined kitchen floor. If you're managing multiple locations, explore how multi-site management works to synchronise your entire estate instantly.
Importing Product Catalogues and Menu Items
Don't waste time with manual data entry for large menus. Use the Excel import feature to upload existing product lists in bulk. If you only have hard copies or PDFs from suppliers, utilise the AI-assisted reading tool. This feature extracts text and allergen data directly from photos or documents. Crucially, the AI serves as a drafting tool for your review and editing. It is not an autonomous publisher. You must verify every ingredient and allergen declaration before pushing data to the SV2 hardware. Following this LabelFood Printer SV2 setup guide step-by-step prevents data mismatches between your dashboard and the kitchen floor.
Setting Shelf-Life and Expiry Parameters
Accuracy in date labelling is non-negotiable for food safety. Within the dashboard, define specific prep dates and expiry durations for every item in your catalogue. The system then automates "use-by" calculations. This removes the risk of mental arithmetic errors by staff. Ensure all date formats follow the UK standard of DD/MM/YYYY. Clear dates prevent confusion during internal audits and EHO inspections. Once these parameters are set, the SV2 terminal handles the rest, providing consistent and legible labels for every prep cycle.
Setting Up Natasha’s Law and Allergen Compliance
Identifying Prepacked for Direct Sale (PPDS) food is the first step in your allergen management workflow. If you package food on-site before a customer orders it, such as sandwiches or salads in a London cafe, you must meet specific standards. This LabelFood Printer SV2 setup guide ensures you apply Natasha’s Law labelling requirements correctly. These rules require a full ingredient list with allergens clearly highlighted. Remember, LabelFood is a record-keeping support tool. It doesn't guarantee regulatory compliance; that responsibility remains with the food business operator.
The SV2 system streamlines the production of these labels, ensuring that every item sold from your grab-and-go fridge or bakery counter carries the necessary data. By centralising this information in the cloud dashboard, you eliminate the risks associated with handwritten labels or inconsistent staff knowledge. Accuracy is the priority. Every ingredient list must be comprehensive and reflect the exact recipe used in your kitchen. This is particularly vital for multi-site operations where consistency across different locations is required for safety.
Configuring the 14 Statutory Allergens
Within the management dashboard, you'll find toggles for the 14 statutory allergens. It's vital to treat peanuts and nuts as separate categories to align with UK safety standards. Accuracy here is paramount. Toggle each relevant allergen for every product in your catalogue. Once selected, the system prepares the data for the SV2 terminal to handle the formatting automatically. This ensures that even if a recipe changes, the correct allergen alerts are pushed to the hardware instantly.
Automating Allergen Highlighting for PPDS
The SV2 terminal is designed to bold or emphasise allergens within the ingredient list. This automation reduces the risk of staff forgetting to highlight a specific item during manual entry. Verify the printed output for legibility. The Food Standards Agency requires these labels to be clear and easy to read. Since supplier ingredients change, you must regularly review your data. Any change amongst your suppliers should be updated in the dashboard and synced to the hardware immediately. This LabelFood Printer SV2 setup guide helps you maintain a disciplined approach to these updates, ensuring your labels always reflect the current state of your pantry.
Establishing Daily Operational Workflows and Waste Tracking
Integrating the SV2 into your daily prep cycle replaces the inconsistent nature of traditional "day dots". These hand-written stickers often peel off, smudge, or become completely illegible in high-moisture cold storage. By following this LabelFood Printer SV2 setup guide, you establish a standardised workflow where every item is clearly marked with its prep date, calculated expiry, and allergen data. This transition creates accurate digital kitchen compliance records for every shift. It ensures your team maintains professional standards without the administrative drag of manual logging, allowing chefs to focus on production rather than paperwork.
Utilise the terminal’s offline mode during peak service hours to maintain maximum efficiency. This ensures zero latency when printing labels, as the device doesn't rely on a live internet connection for every individual action. It prevents the frustration of "waiting for the cloud" during a busy prep cycle. At the end of the service, the terminal synchronises all stored data with the cloud management dashboard automatically. This background process ensures your records are always up to date across all sites whilst your staff focuses on the clean-down. It bridges the gap between physical kitchen activity and digital management oversight.
Assigning Individual Staff PINs for Accountability
Accountability is the foundation of a safe, professional kitchen environment. Create unique PINs for every team member within the management dashboard to ensure accurate staff attribution. This ensures that every label printed and every waste entry made is attributed to a specific person. You can then monitor the Staff Activity report to identify training needs or workflow bottlenecks that may be slowing down your line. Ensure staff understand that their PIN is their digital signature. It validates that they have checked the product and confirmed the data before printing a label.
Configuring Food Waste Recording with Photos
Enable the food waste recording software features directly on the SV2 terminal. Traditional waste sheets are often lost, incomplete, or filled in retrospectively with inaccurate data. The SV2 allows staff to record waste items instantly, adding photos and notes for immediate context. This visual data provides absolute clarity on why specific items are being discarded. Review these waste reports weekly to identify patterns, such as over-ordering or prep errors, to reduce your kitchen overheads and improve sustainability. To start improving your kitchen's operational margins, view our complete food labelling solutions.
Preparing for EHO Inspections and System Maintenance
Environmental Health Officers (EHOs) value transparent, accessible management systems. Digital logs provide a clear, chronological history of kitchen activity that paper-based folders often struggle to match. This LabelFood Printer SV2 setup guide concludes with the essential steps for maintaining your hardware and managing your digital data for inspections. Whether you operate under the Food Hygiene Rating Scheme used in England, Wales, and Northern Ireland, or Scotland’s Food Hygiene Information Scheme, having accessible records is vital. The system acts as a central repository for your food safety data. It makes it easier to present information during an unannounced visit, showing that you take your statutory obligations seriously.
Regular internal audits help you stay ahead of official inspections. Access the Compliance Pack and Label Report through the management dashboard at least once a week. These reports verify that your labelling behaviour aligns with your established food safety management system. Reviewing these logs allows you to spot inconsistencies in staff activity or labelling accuracy before they become issues during a formal audit. By examining these records, you can confirm that the 14 statutory allergens are being correctly highlighted on all PPDS items, maintaining the standards established in earlier setup phases.
Hardware Maintenance and Cleaning Routine
A professional kitchen terminal must look the part. Maintain a high standard of hardware cleanliness to ensure a professional presentation to inspectors. Clean the thermal print head weekly using an approved cleaning pen or wipe to prevent carbon build-up. This ensures every label remains sharp and legible. Keep the SV2 exterior free from kitchen grease and flour dust, which can compromise the touchscreen's responsiveness over time. Inspect power cables and network connections for wear or damage regularly to avoid unexpected downtime during service. A well-maintained device is a sign of a well-maintained kitchen.
Generating Compliance Reports for Auditors
Learn how to export the Compliance Pack instantly for an EHO inspector. This feature allows you to provide requested data on-demand, demonstrating a proactive approach to food safety management. Review the Label Report to ensure all printed labels met regulatory standards, including correct allergen highlighting and expiry calculations. Digital records provide a robust audit trail that paper systems cannot match. They prove that your kitchen is disciplined, organised, and focused on precision. This digital-first approach ensures that your records are audit-ready at any time of the day or night.
Standardising Your Kitchen Compliance
Transitioning from manual, error-prone labelling to a digital workflow shouldn't be complex. By following this LabelFood Printer SV2 setup guide, you establish a disciplined system that addresses the specific demands of UK food safety regulations. You've moved beyond fragile tablet setups to a dedicated standalone terminal designed specifically for professional kitchen environments. This hardware is built to withstand the daily pressures of a busy line whilst ensuring total data accuracy.
Your kitchen now benefits from automated Natasha’s Law compliance tools for PPDS items and integrated digital food waste recording with photo support. These features don't just improve operational efficiency; they provide the clear, audit-ready records required for modern EHO inspections. Maintaining these high standards requires consistent hardware cleaning and regular menu data reviews. Once established, this system acts as a reliable partner in your daily operations, ensuring every label is legible and every waste entry is attributed to a specific team member via their individual PIN.
Optimise your kitchen compliance with the LabelFood Printer SV2. Your team can now focus on service with the confidence that your labelling and waste tracking are precise, professional, and built for the long term.
Frequently Asked Questions
Does the LabelFood Printer SV2 require a constant internet connection?
No, the SV2 terminal is designed with standalone functionality that allows it to operate offline during busy service periods. This ensures there is zero latency when printing labels even if your kitchen Wi-Fi is unstable. The device stores all labelling and waste data locally and synchronises with the cloud management dashboard automatically once a connection is re-established.
How do I add a new menu item to the SV2 printer?
Add new items through the management dashboard on a web browser or iPad. You can input data manually, upload Excel files in bulk, or use the AI-assisted tool to read supplier PDFs. This LabelFood Printer SV2 setup guide emphasises that any AI-generated data must be reviewed and edited by a manager before it is published to the terminal to ensure absolute accuracy.
Can I use the LabelFood management dashboard on my Android phone?
No, the management panel is currently restricted to web browsers and iOS or iPadOS devices. There is no Android version of the dashboard available. Kitchen managers can access the full suite of reporting tools, including the Compliance Pack and Staff Activity reports, from any compatible laptop or Apple tablet connected to the internet.
What is the difference between Natasha’s Law and standard allergen labelling?
Natasha’s Law applies specifically to food that is Prepacked for Direct Sale (PPDS), requiring a full ingredient list with all 14 statutory allergens emphasised. Standard allergen labelling for non-prepacked food often only requires allergen information to be available upon request. The LabelFood system automates the highlighting process for PPDS items to help you maintain consistent records across your inventory.
How do I assign individual PINs to my kitchen staff?
Access the Staff Activity section within your cloud dashboard to generate unique PINs for every team member. These codes act as digital signatures for every label printed and every waste entry recorded on the SV2 hardware. This level of attribution is essential for identifying training needs and maintaining high levels of accountability within a professional kitchen environment.
What should I do if the thermal labels are printing faintly?
Clean the thermal print head using an approved cleaning pen or wipe as the first step. Kitchen grease or dust build-up often interferes with heat transfer, leading to faded text. Ensure you are using official LabelFood thermal rolls, as generic alternatives may not meet the specific sensitivity requirements of the SV2 terminal. Regularly following the LabelFood Printer SV2 setup guide maintenance routine prevents these legibility issues.
Does the system automatically update for new UK food safety regulations?
Yes, the LabelFood software is updated centrally to reflect changes in UK legislation, such as the upcoming Benedict’s Law in September 2026. Whilst the system provides the framework for these new standards, you must still review your specific menu data and ingredient lists. The system serves as a support tool for your record-keeping rather than a guaranteed compliance solution.